Spring Boot(二十三):springBoot集成mybatis

介绍

Spring Boot集成MyBatis,有两种方式:注解方式以及XML方式。需要添加mybatis-spring-boot-starter依赖跟mysql依赖:

1
2
3
4
5
6
7
8
9
10
<dependency>
<groupId>org.mybatis.spring.boot</groupId>
<artifactId>mybatis-spring-boot-starter</artifactId>
<version>1.3.0</version>
</dependency>

<dependency>
<groupId>mysql</groupId>
<artifactId>mysql-connector-java</artifactId>
</dependency>

MyBatis-Spring-Boot-Starter依赖将会提供如下:

  • 自动检测现有的DataSource;
  • 将创建并注册SqlSessionFactory的实例,该实例使用SqlSessionFactoryBean将该DataSource作为输入进行传递;
  • 将创建并注册从SqlSessionFactory中获取的SqlSessionTemplate的实例;
  • 自动扫描mappers,链接到SqlSessionTemplate并将其注册到Spring上下文,以便将它们注入到bean中。

就是说,使用了该Starter之后,只需要定义一个DataSource即可。

默认数据源

Spring Boot默认使用tomcat-jdbc数据源,在src/main/resources/application.properties中配置数据源信息:

1
2
3
4
spring.datasource.url = jdbc:mysql://localhost:3306/dodd?useUnicode=true&characterEncoding=utf-8
spring.datasource.username =
spring.datasource.password =
spring.datasource.driver-class-name = com.mysql.jdbc.Driver

注:这里有一个坑是数据源配置信息是以spring开头的,不是以jdbc

自定义数据源

比如这里使用了阿里巴巴的数据池管理,除了在application.properties配置数据源之外,还应该额外添加以下依赖:

1
2
3
4
5
<dependency>
<groupId>com.alibaba</groupId>
<artifactId>druid</artifactId>
<version>1.0.19</version>
</dependency>

修改Application.java

1
2
3
4
5
6
7
8
9
10
11
12
13
14
15
16
17
18
19
20
21
22
23
24
25
26
27
28
29
@SpringBootApplication
public class Application {

public static void main(String[] args) {
SpringApplication.run(Application.class, args);
}

@Autowired
private Environment env;

//destroy-method="close"的作用是当数据库连接不使用的时候,就把该连接重新放到数据池中,方便下次使用调用.
@Bean(destroyMethod = "close")
public DataSource dataSource() {
DruidDataSource dataSource = new DruidDataSource();
dataSource.setUrl(env.getProperty("spring.datasource.url"));
dataSource.setUsername(env.getProperty("spring.datasource.username"));//用户名
dataSource.setPassword(env.getProperty("spring.datasource.password"));//密码
dataSource.setDriverClassName(env.getProperty("spring.datasource.driver-class-name"));
dataSource.setInitialSize(2);//初始化时建立物理连接的个数
dataSource.setMaxActive(20);//最大连接池数量
dataSource.setMinIdle(0);//最小连接池数量
dataSource.setMaxWait(60000);//获取连接时最大等待时间,单位毫秒。
dataSource.setValidationQuery("SELECT 1");//用来检测连接是否有效的sql
dataSource.setTestOnBorrow(false);//申请连接时执行validationQuery检测连接是否有效
dataSource.setTestWhileIdle(true);//建议配置为true,不影响性能,并且保证安全性。
dataSource.setPoolPreparedStatements(false);//是否缓存preparedStatement,也就是PSCache
return dataSource;
}
}

Spring Boot会智能地选择我们自己配置的这个DataSource实例。

MyBatis集成:注解方式

Mybatis注解的方式很简单,只要定义一个接口,然后sql语句通过注解写在接口方法上。最后给这个接口添加@Mapper注解或者在启动类上添加@MapperScan(“com.dodd.mapper”)注解都行。

1
2
3
4
5
6
7
8
9
10
11
12
13
14
15
16
17
18
19
20
21
22
23
24
25
26
27
28
29
30
31
32
33
34
35
36
37
38
39
40
41
42
43
44
45
46
47
48
49
50
51
52
53
@Mapper
public interface RouteMapper {
@Insert("insert into learn_resource(author, title,url) values(#{author},#{title},#{url})")
int add(LearnResouce learnResouce);

@Update("update learn_resource set author=#{author},title=#{title},url=#{url} where id = #{id}")
int update(LearnResouce learnResouce);

@DeleteProvider(type = LearnSqlBuilder.class, method = "deleteByids")
int deleteByIds(@Param("ids") String[] ids);


@Select("select * from learn_resource where id = #{id}")
@Results(id = "learnMap", value = {
@Result(column = "id", property = "id", javaType = Long.class),
@Result(property = "author", column = "author", javaType = String.class),
@Result(property = "title", column = "title", javaType = String.class)
})
LearnResouce queryLearnResouceById(@Param("id") Long id);

@SelectProvider(type = LearnSqlBuilder.class, method = "queryLearnResouceByParams")
List<LearnResouce> queryLearnResouceList(Map<String, Object> params);

class LearnSqlBuilder {
public String queryLearnResouceByParams(final Map<String, Object> params) {
StringBuffer sql =new StringBuffer();
sql.append("select * from learn_resource where 1=1");
if(!StringUtil.isNull((String)params.get("author"))){
sql.append(" and author like '%").append((String)params.get("author")).append("%'");
}
if(!StringUtil.isNull((String)params.get("title"))){
sql.append(" and title like '%").append((String)params.get("title")).append("%'");
}
System.out.println("查询sql=="+sql.toString());
return sql.toString();
}

//删除的方法
public String deleteByids(@Param("ids") final String[] ids){
StringBuffer sql =new StringBuffer();
sql.append("DELETE FROM learn_resource WHERE id in(");
for (int i=0;i<ids.length;i++){
if(i==ids.length-1){
sql.append(ids[i]);
}else{
sql.append(ids[i]).append(",");
}
}
sql.append(")");
return sql.toString();
}
}
}

需要注意的是,简单的语句只需要使用@Insert@Update@Delete@Select这4个注解即可,但是有些复杂点需要动态SQL语句,就比如上面方法中根据查询条件是否有值来动态添加sql的,就需要使用@InsertProvider@UpdateProvider@DeleteProvider@SelectProvider等注解。

MyBatis集成:XML方式

xml配置方式保持映射文件的老传统,优化主要体现在不需要实现接口的实现层,系统会自动根据方法名在映射文件中找对应的sql,具体操作如下:

接口定义:可以使用@Mapper或者@Repository

1
2
3
4
5
6
7
8
9
10
11
12
13
14
15
16
@Repository //声明为数据源接口
public interface RouteMapper {
List<Route> queryRoutes(RouteQueryListCondition condition);
//mapper的insert不能使用前端VO,要使用实体类
void insertRoute(Route route);

void updateRoute(Route route);

void deleteRoutes(@Param("ids") List<Integer> ids);

List<String> getAllServerName(String project);

Route getRouteById(Integer id);

List<Route> getRoutesByIds(@Param("ids") List<Integer> ids);
}

修改application.properties 配置文件:

1
2
3
4
#指定bean所在包
mybatis.type-aliases-package=com.dodd.entity
#指定映射文件
mybatis.mapperLocations=classpath:mapper/*.xml

在src/main/resources目录下新建一个mapper目录,在mapper目录下新建RouteMapper.xml文件。

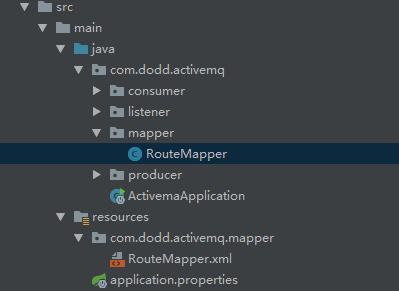
也可以不修改application.properties 配置文件,在src/main/resources目录下新建与mapper接口同名的目录文件夹,下面定义RouteMapper.xml文件,例如:

通过mapper标签中的namespace属性指定对应的dao映射,这里指向RouteMapper:

1
2
3
4
5
6
7
8
9
10
11
12
13
14
15
16
17
18
19
20
21
22
23
24
25
26
27
28
29
30
31
32
33
34
35
36
37
38
39
40
41
42
43
44
45
46
47
48
49
50
51
52
53
54
55
56
57
58
59
60
61
62
63
64
65
66
67
68
69
70
71
72
73
74
75
76
77
78
<?xml version="1.0" encoding="UTF-8"?>
<!DOCTYPE mapper
PUBLIC "-//mybatis.org//DTD Mapper 3.0//EN"
"http://mybatis.org/dtd/mybatis-3-mapper.dtd">
<mapper namespace="com.dodd.activemq.mapper.RouteMapper">
<!-- 表联查时,需要将查询的字段在resultMap中补全,可以来自于其他表 -->
<!-- 一个Mapper.xml文件中可以配置多个resultMap -->
<resultMap id="route" type="com.dodd.entity.Route">
<result column="id" property="id"/>
<result column="serverName" property="serverName"/>
<result column="path" property="path"/>
<result column="serviceId" property="serviceId"/>
<result column="stripPrefix" property="stripPrefix"/>
<result column="retryable" property="retryable"/>
<result column="sensitiveHeaders" property="sensitiveHeaders"/>
<result column="url" property="url"/>
<result column="project" property="project"/>
</resultMap>

<select id="queryRoutes" parameterType="com.dodd.vo.RouteQueryListCondition" resultMap="route">
select * from route where project = #{project}
<if test="serverName != null">
AND serverName = #{serverName}
</if>
<if test="path != null">
AND path LIKE CONCAT('%', #{path}, '%')
</if>
<if test="serviceId != null">
AND serviceId LIKE CONCAT('%', #{serviceId}, '%')
</if>
ORDER BY serverName;
</select>

<insert id="insertRoute" parameterType="com.dodd.entity.Route" useGeneratedKeys="true" keyColumn="id" keyProperty="id">
INSERT INTO route (
serverName,
path,
serviceId,
stripPrefix,
project
) VALUES (
#{serverName},
#{path},
#{serviceId},
#{stripPrefix},
#{project}
);
</insert>

<update id="updateRoute" parameterType="com.dodd.entity.Route">
UPDATE route
SET
serverName = #{serverName},
path = #{path},
serviceId = #{serviceId},
stripPrefix = #{stripPrefix}
WHERE id = #{id};
</update>

<!-- 当参数为集合时,parameterType的值为集合内元素的值的类型而不是集合的类型 -->
<delete id="deleteRoutes">
DELETE FROM route WHERE id IN
<foreach item="id" collection="ids" open="(" separator="," close=")">
#{id}
</foreach>
;
</delete>

<!-- 这里parameterType的值可以是string,也可以是java.lang.String -->
<select id="getAllServerName" parameterType="string" resultType="string">
SELECT DISTINCT serverName FROM route WHERE serverName != '' AND project=#{project};
</select>

<select id="getRouteById" parameterType="java.lang.Integer" resultMap="route">
SELECT * FROM route WHERE id = #{id};
</select>

</mapper>

分页插件

pom.xml中添加依赖:

1
2
3
4
5
<dependency>
<groupId>com.github.pagehelper</groupId>
<artifactId>pagehelper-spring-boot-starter</artifactId>
<version>1.1.0</version>
</dependency>

然后你只需在查询list之前使用PageHelper.startPage(int pageNum, int pageSize)方法即可。pageNum是第几页,pageSize是每页多少条:

1
2
3
4
5
@Override
public List<LearnResouce> queryLearnResouceList(Map<String,Object> params) {
PageHelper.startPage(Integer.parseInt(params.get("page").toString()), Integer.parseInt(params.get("rows").toString()));
return this.routeMapper.queryLearnResouceList(params);
}

分页插件PageHelper项目地址

分页还有一种实现方式是前端需要传pageNum和pageSize,查询时用limit做限制。